Lights#
The pyvista.Light class adds additional functionality and a pythonic API
to the vtkLight class. pyvista.Plotter objects come with a default
set of lights that work well in most cases, but in many situations a more hands-on
access to lighting is necessary.
Brief Example#
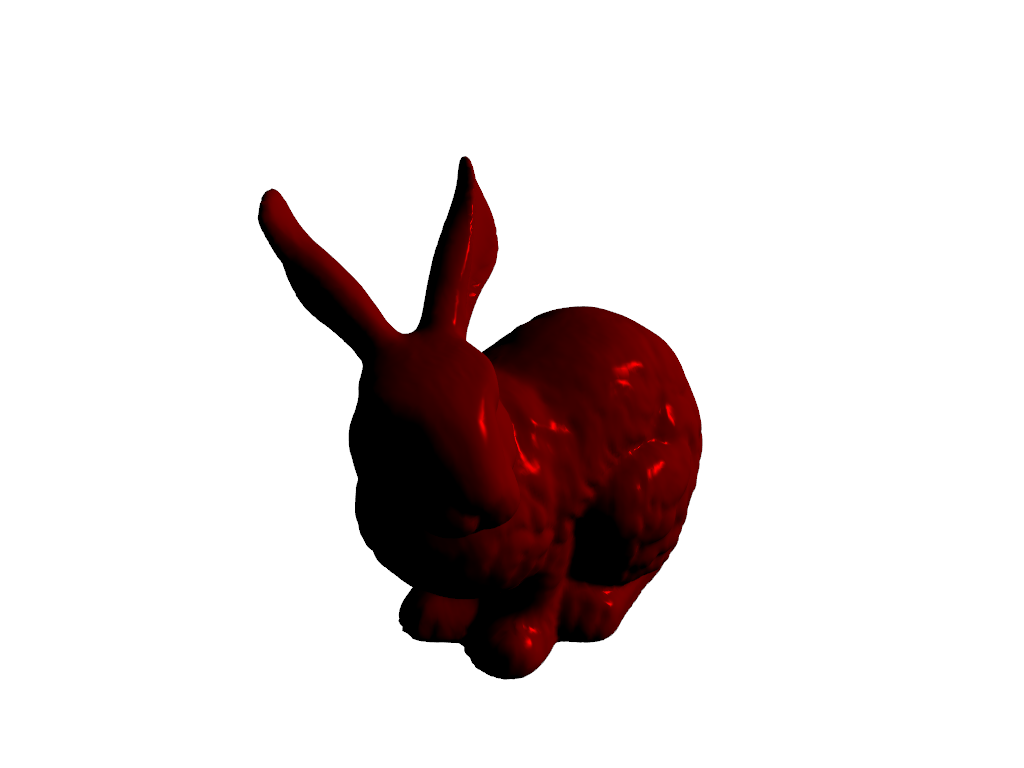
Create a red spotlight that shines on the origin, then create a scene without lighting and add our light to it manually.
import pyvista as pv
from pyvista import examples
light = pv.Light(position=(-1, 1, 1), color='red')
light.positional = True

import pyvista as pv
from pyvista import examples
pl = pv.Plotter(lighting='none')
pl.background_color = 'white'
mesh = examples.download_bunny()
mesh.rotate_x(90, inplace=True)
mesh.rotate_z(180, inplace=True)
pl.add_mesh(mesh, specular=1.0, diffuse=0.7, smooth_shading=True)
pl.add_light(light)
pl.show()

For detailed examples please see Lighting.
Light API#
pyvista.Light instances come in three types: headlights, camera lights, and
scene lights. Headlights always shine along the camera’s axis, camera lights
have a fixed position with respect to the camera, and scene lights are positioned
with respect to the scene, such that moving around the camera doesn’t affect the
lighting of the scene.
Lights have a position and a
focal_point that define the axis of the
light. The meaning of these depends on the type of the light. The color of the
light can be set according to ambient, diffuse, and specular components. The
brightness can be set with the intensity
property, and the writable on property specifies
whether the light is switched on.
Lights can be either directional (meaning an infinitely distant point source)
or positional. Positional lights have
additional properties that describe the geometry and the spatial distribution
of the light. The cone_angle and
exponent properties define the shape of the
light beam and the angular distribution of the light’s intensity within that
beam. The fading of the light with distance can be customized with the
attenuation_values property.
Positional lights can also make use of an actor that represents the shape and
color of the light using a wire-frame, see show_actor.
Positional lights with a cone_angle of
less than 90 degrees are known as spotlights. Spotlights are unidirectional and
they make full use of beam shaping properties, namely exponent and attenuation. Non-spotlight positional lights,
however, act like point sources located in the real-world position of the
light, shining in all directions of space. They display attenuation with
distance from the source, but their beam is isotropic in space. In contrast,
directional lights act as infinitely distant point sources, so they are
unidirectional but they do not attenuate.
Shadows#
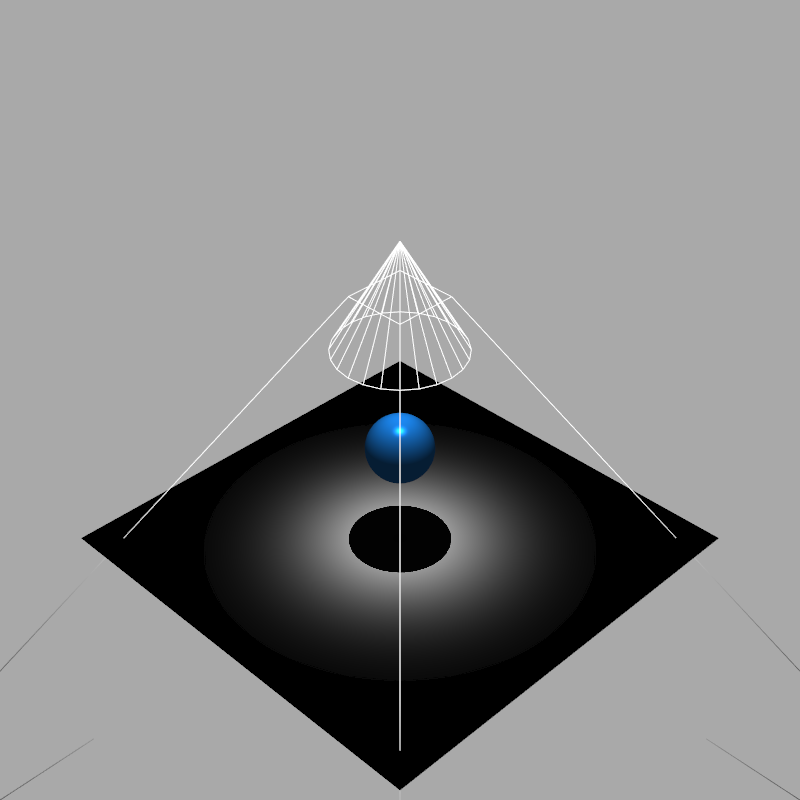
With directed lights, it is possible to create complex lighting scenarios. For example, you can position a light directly above an actor (in this case, a sphere), to create a shadow directly below it.
The following example uses a positional light to create an eclipse-like shadow below a sphere by controlling the cone angle and exponent values of the light.
import pyvista as pv

pl = pv.Plotter(lighting=None, window_size=(800, 800))

# create a top down light
light = pv.Light(position=(0, 0, 3), show_actor=True, positional=True,
                 cone_angle=30, exponent=20, intensity=1.5)
pl.add_light(light)

# add a sphere to the plotter
sphere = pv.Sphere(radius=0.3, center=(0, 0, 1))
pl.add_mesh(sphere, ambient=0.2, diffuse=0.5, specular=0.8,
                 specular_power=30, smooth_shading=True,
                 color='dodgerblue')

# add the grid
grid = pv.Plane(i_size=4, j_size=4)
pl.add_mesh(grid, ambient=0, diffuse=0.5, specular=0.8, color='white')

# set up and show the plotter
pl.enable_shadows()
pl.set_background('darkgrey')
pl.show()

Note
VTK has known issues when rendering shadows on certain window
sizes. Be prepared to experiment with the window_size
parameter.
API Reference#
|
Light class. |