Depth of Field Plotting#
Download Python source code | Download Jupyter notebook
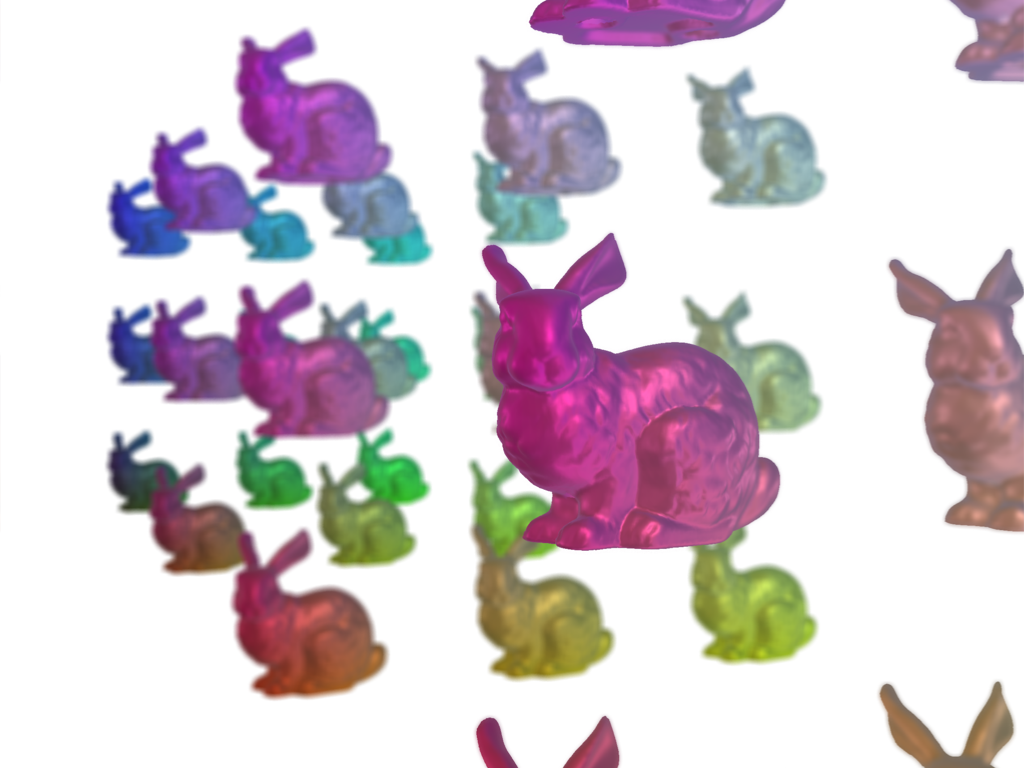
Highlight part of a plot using enable_depth_of_field().
import numpy as np
import pyvista as pv
from pyvista import examples
Generate a Bunch of Bunnies#
Create many bunnies using the glyph
filter.
# download the stanford bunny and rotate it into a good position
mesh = examples.download_bunny()
mesh = mesh.rotate_x(90, inplace=False).rotate_z(90, inplace=False).scale(4)

# We use a uniform grid here simply to create equidistantly spaced points for
# our glyph filter
grid = pv.ImageData(dimensions=(4, 3, 3), spacing=(3, 1, 1))

bunnies = grid.glyph(geom=mesh, scale=False, orient=False)
bunnies
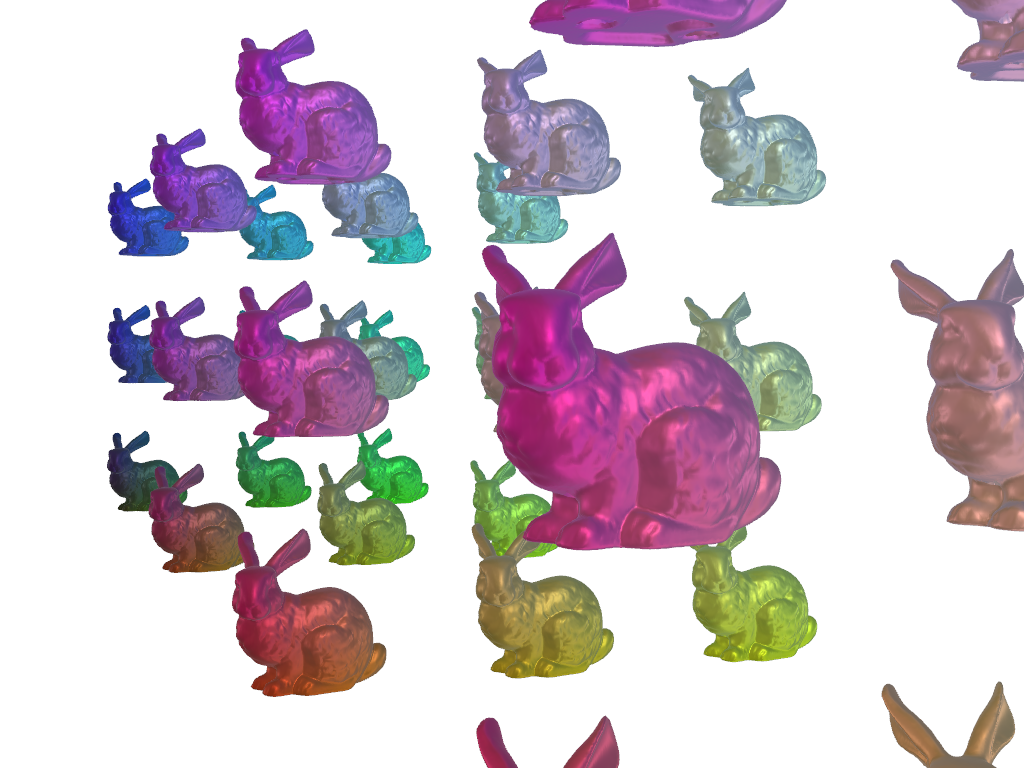
Show the Plot Without Enabling Depth of Field#
# convert points into rgba colors
colors = bunnies.points - bunnies.bounds[::2]
colors /= colors.max(axis=0)
colors *= 255
colors = colors.astype(np.uint8)

# obtained camera position with `cpos = pl.show(return_cpos)`
cpos = pv.CameraPosition(
    position=(11.62, -1.28, 1.534),
    focal_point=(4.135, 1.48, 1.271),
    viewup=(-0.0352, -0.0004, 1.0),
)

# Since we're using physically based rendering (PBR), let's also download a
# skybox cubemap use it as an environment texture. For PBR to work well you
# should have a environment texture.
cubemap = examples.download_sky_box_cube_map()

pl = pv.Plotter()
pl.background_color = 'w'
pl.add_mesh(bunnies, scalars=colors, rgb=True, pbr=True, metallic=0.85)
pl.camera_position = cpos
pl.set_environment_texture(cubemap)
pl.show()
Show the Plot While Enabling Depth of Field#
pl = pv.Plotter()
pl.background_color = 'w'
pl.add_mesh(bunnies, scalars=colors, rgb=True, pbr=True, metallic=0.85)
pl.camera_position = cpos
pl.enable_depth_of_field()
pl.enable_anti_aliasing('fxaa')
pl.set_environment_texture(cubemap)
pl.show()
Total running time of the script: (0 minutes 23.325 seconds)