Note
Go to the end to download the full example code.
Plotter Lighting Systems#
The pyvista.Plotter class comes with three options for the default
lighting system:
a light kit consisting of a headlight and four camera lights,
an illumination system containing three lights arranged around the camera,
no lighting.
With meshes that don’t have depth information encoded in their color the importance of an appropriate lighting setup becomes paramount for accurate visualization.
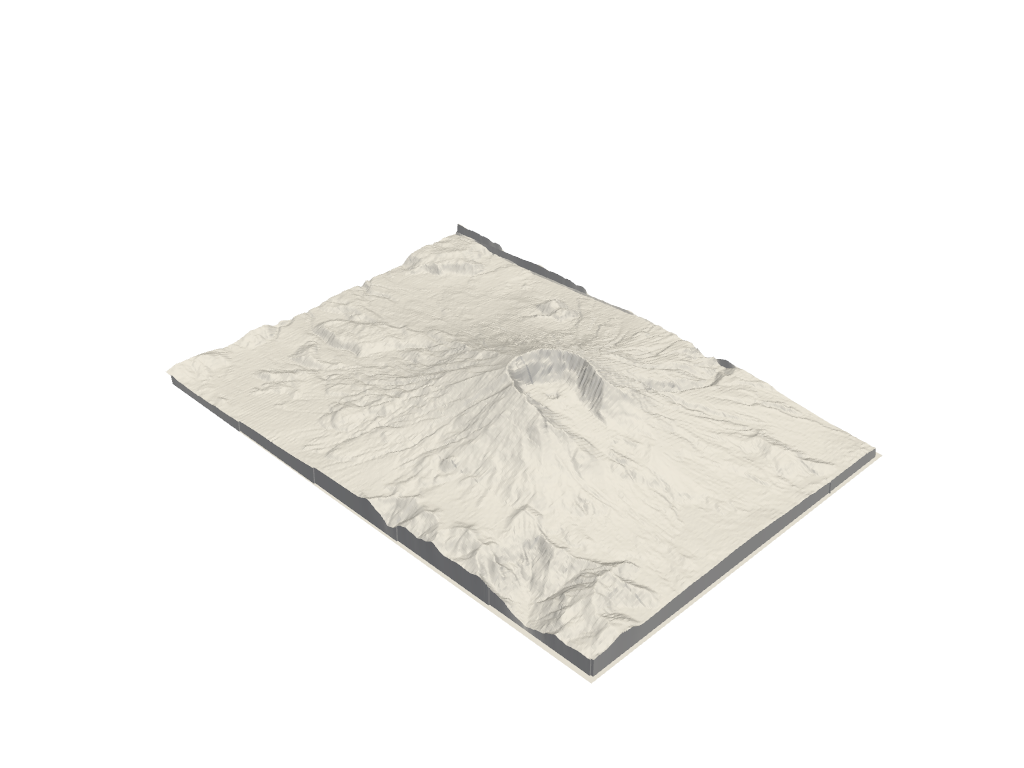
Light kit#
The default lighting='light kit' option recreates a lighting setup that
corresponds to a vtk.vtkLightKit. We can check what type of lights this
lighting comprises:
from __future__ import annotations

import pyvista as pv
from pyvista import examples

# default: light kit
plotter = pv.Plotter()
light_types = [light.light_type for light in plotter.renderer.lights]

# Remove from plotters so output is not produced in docs
pv.plotting.plotter._ALL_PLOTTERS.clear()

light_types
[<LightType.HEADLIGHT: 1>, <LightType.CAMERA_LIGHT: 2>, <LightType.CAMERA_LIGHT: 2>, <LightType.CAMERA_LIGHT: 2>, <LightType.CAMERA_LIGHT: 2>]
Add a white terrain to the scene:
mesh = examples.download_st_helens().warp_by_scalar()
plotter = pv.Plotter()
plotter.add_mesh(mesh, color='white')
plotter.show()
Three-lights illumination#
Switching to three-lights illumination gives a different character to the figure, in this case showing less contrast when viewing the mountain from the top, but having more contrast with views closer to the side. This becomes especially clear when exploring the figures interactively.
plotter = pv.Plotter(lighting='three lights')
plotter.add_mesh(mesh, color='white')
plotter.show()
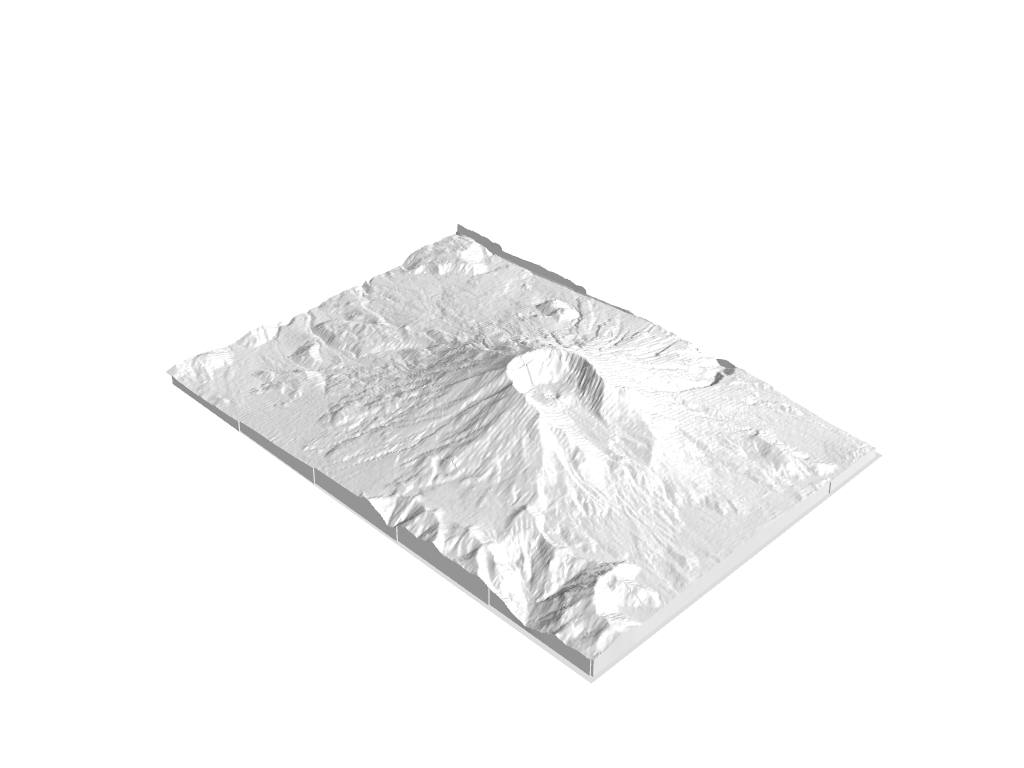
Again we can check what kind of lights this setting uses:
plotter = pv.Plotter(lighting='three lights')
light_types = [light.light_type for light in plotter.renderer.lights]

# Remove from plotters so output is not produced in docs
pv.plotting.plotter._ALL_PLOTTERS.clear()

light_types
[<LightType.CAMERA_LIGHT: 2>, <LightType.CAMERA_LIGHT: 2>, <LightType.CAMERA_LIGHT: 2>]
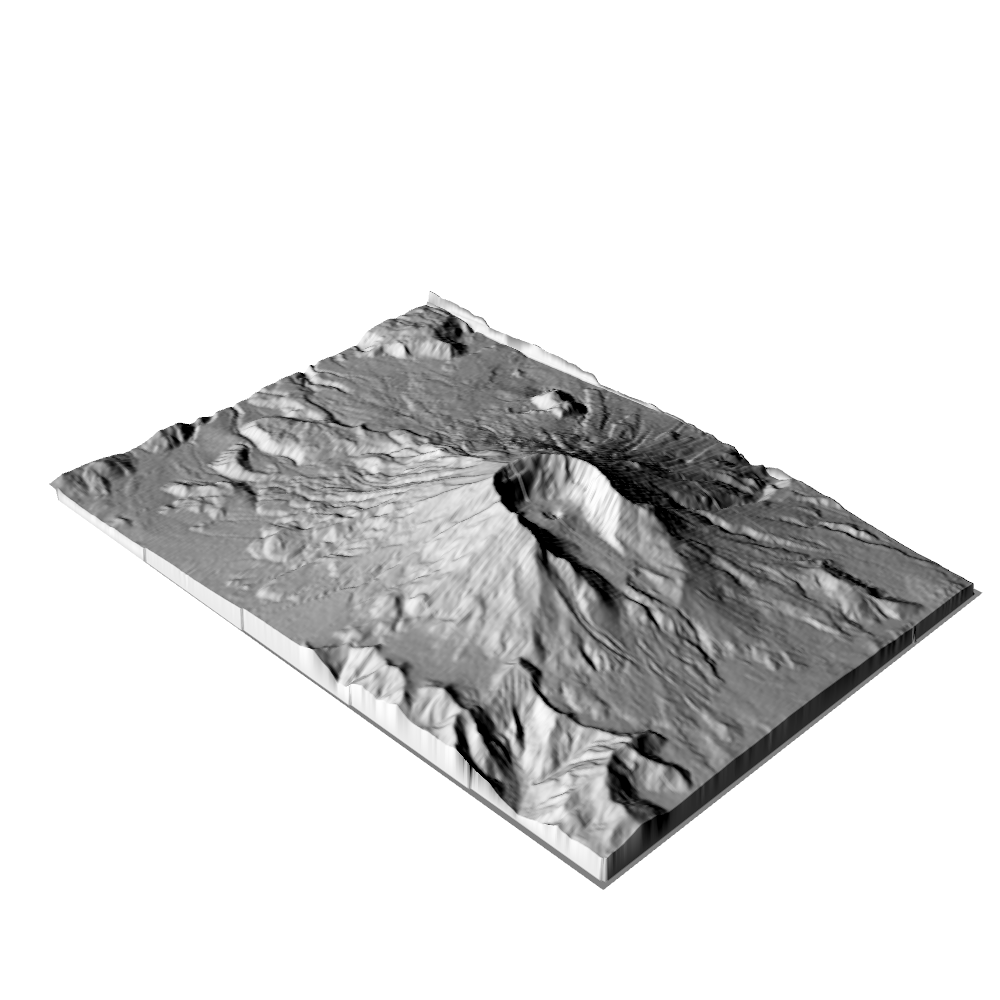
Custom lighting#
We can introduce our own lighting from scratch by disabling any lighting on plotter initialization. Adding a single scene light to a scene will often result in ominous visuals due to objects having larger regions in shadow.
plotter = pv.Plotter(lighting='none', window_size=(1000, 1000))
plotter.add_mesh(mesh, color='white', smooth_shading=True)
light = pv.Light()
light.set_direction_angle(30, -20)
plotter.add_light(light)
plotter.show()
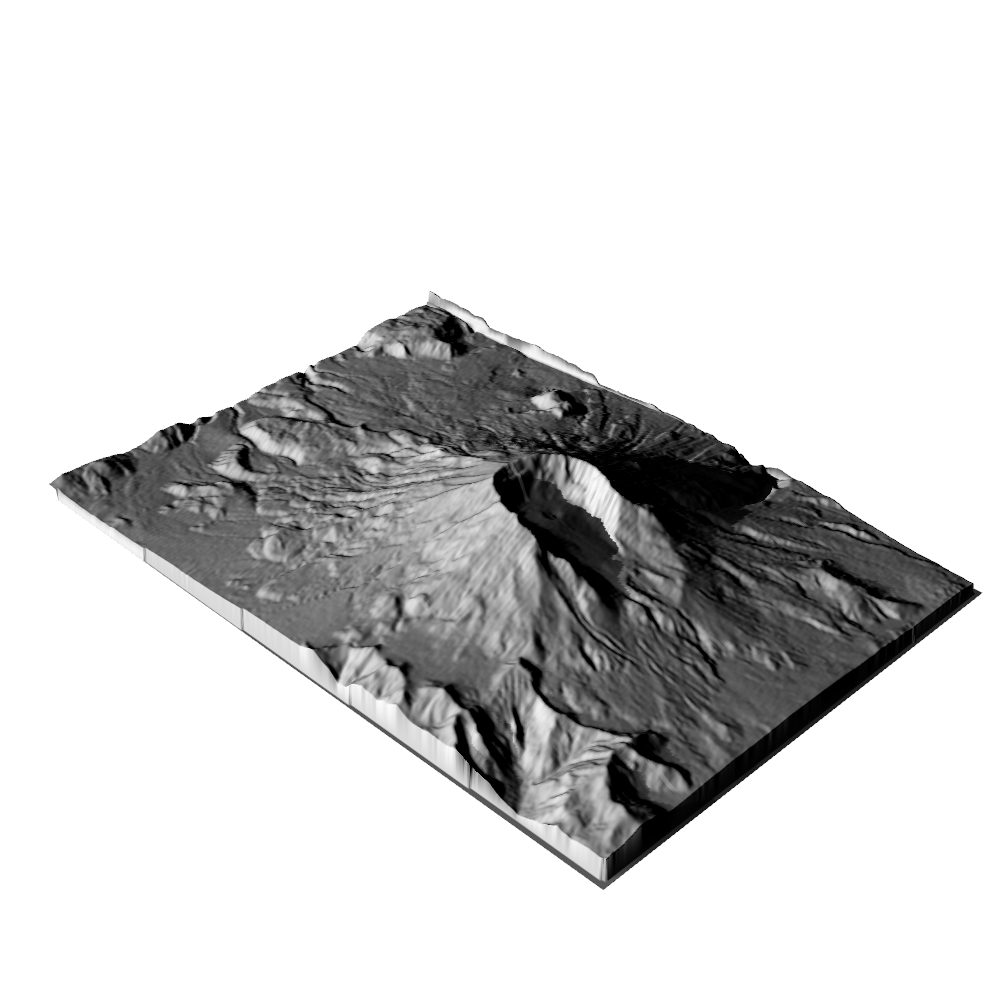
Custom lighting with shadows#
Here, we enable_shadows to enhance the effect that the lighting
angle has. It has a subtle, but realistic effect. Notice the sharp
shadows due to the mountaintop.
plotter = pv.Plotter(lighting='none', window_size=(1000, 1000))
plotter.add_mesh(mesh, color='white', smooth_shading=True)
light = pv.Light()
light.set_direction_angle(20, -20)
plotter.add_light(light)
plotter.enable_shadows()
plotter.show()
Total running time of the script: (0 minutes 7.695 seconds)