Orthogonal Slices#
Download Python source code | Download Jupyter notebook
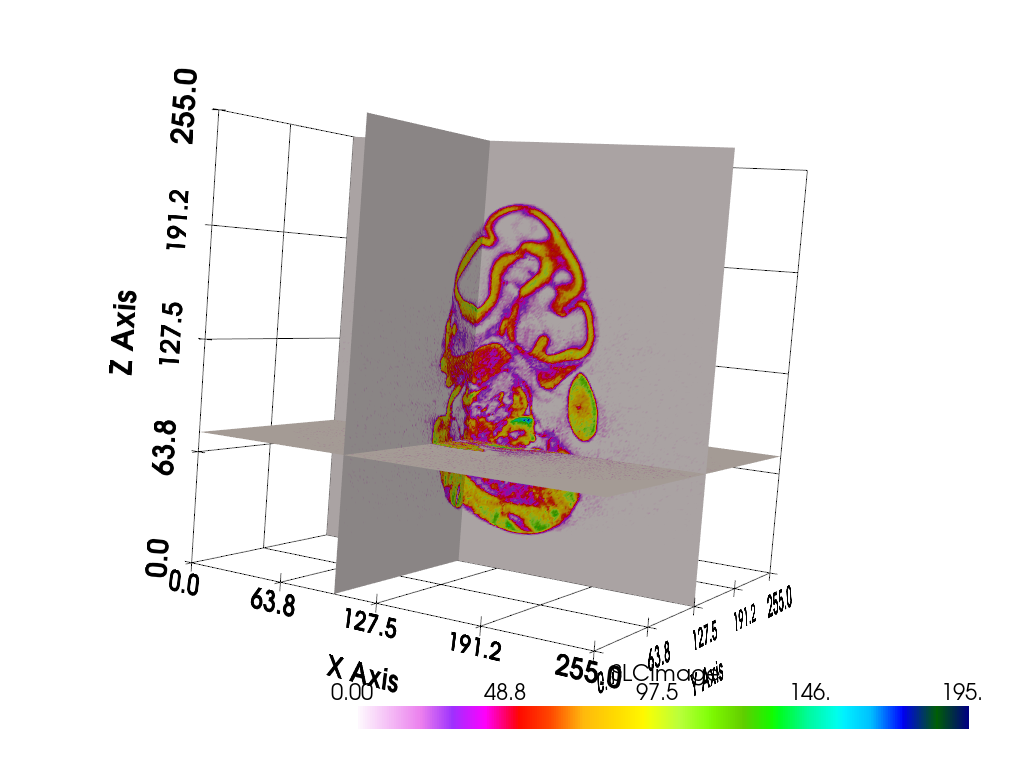
View three orthogonal slices from a mesh.
Use the pyvista.DataObjectFilters.slice_orthogonal() filter to create these
slices simultaneously.
import pyvista as pv
from pyvista import examples

mesh = examples.download_embryo()
mesh.bounds
BoundsTuple(x_min =   0.0,
            x_max = 255.0,
            y_min =   0.0,
            y_max = 255.0,
            z_min =   0.0,
            z_max = 255.0)
Create three slices. Easily control their locations with the x, y,
and z arguments.
slices = mesh.slice_orthogonal(x=100, z=75)
cpos = pv.CameraPosition(
    position=(540.9, -617.2, 180.5),
    focal_point=(128.3, 126.5, 111.8),
    viewup=(-0.1065, 0.03275, 0.9938),
)
dargs = dict(cmap='gist_ncar_r')

pl = pv.Plotter()
pl.add_mesh(slices, **dargs)
pl.show_grid()
pl.show(cpos=cpos)
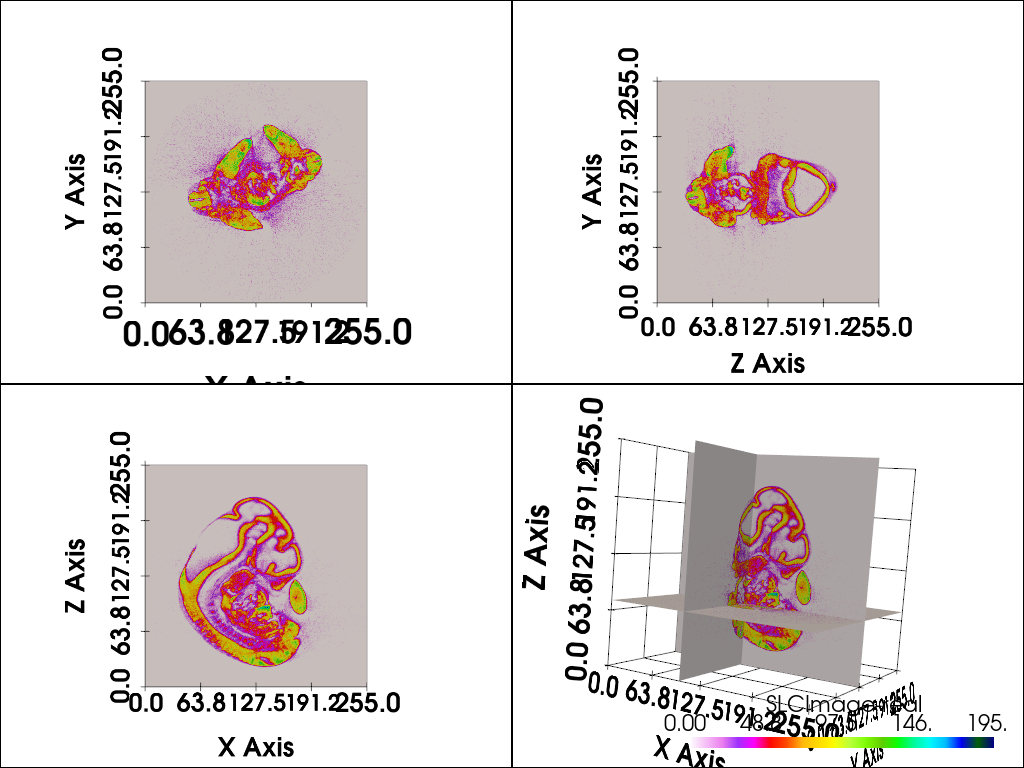
pl = pv.Plotter(shape=(2, 2))
# XYZ - show 3D scene first
pl.subplot(1, 1)
pl.add_mesh(slices, **dargs)
pl.show_grid()
pl.camera_position = cpos
# XY
pl.subplot(0, 0)
pl.add_mesh(slices, **dargs)
pl.show_grid()
pl.camera_position = 'xy'
pl.enable_parallel_projection()
# ZY
pl.subplot(0, 1)
pl.add_mesh(slices, **dargs)
pl.show_grid()
pl.camera_position = 'zy'
pl.enable_parallel_projection()
# XZ
pl.subplot(1, 0)
pl.add_mesh(slices, **dargs)
pl.show_grid()
pl.camera_position = 'xz'
pl.enable_parallel_projection()

pl.show()
Total running time of the script: (0 minutes 2.797 seconds)