Cameras#
The pyvista.Camera class adds additional functionality and a
pythonic API to the vtkCamera class. pyvista.Camera
objects come with a default set of cameras that work well in most
cases, but in many situations a more hands-on approach to using the
camera is necessary.
Brief Example#
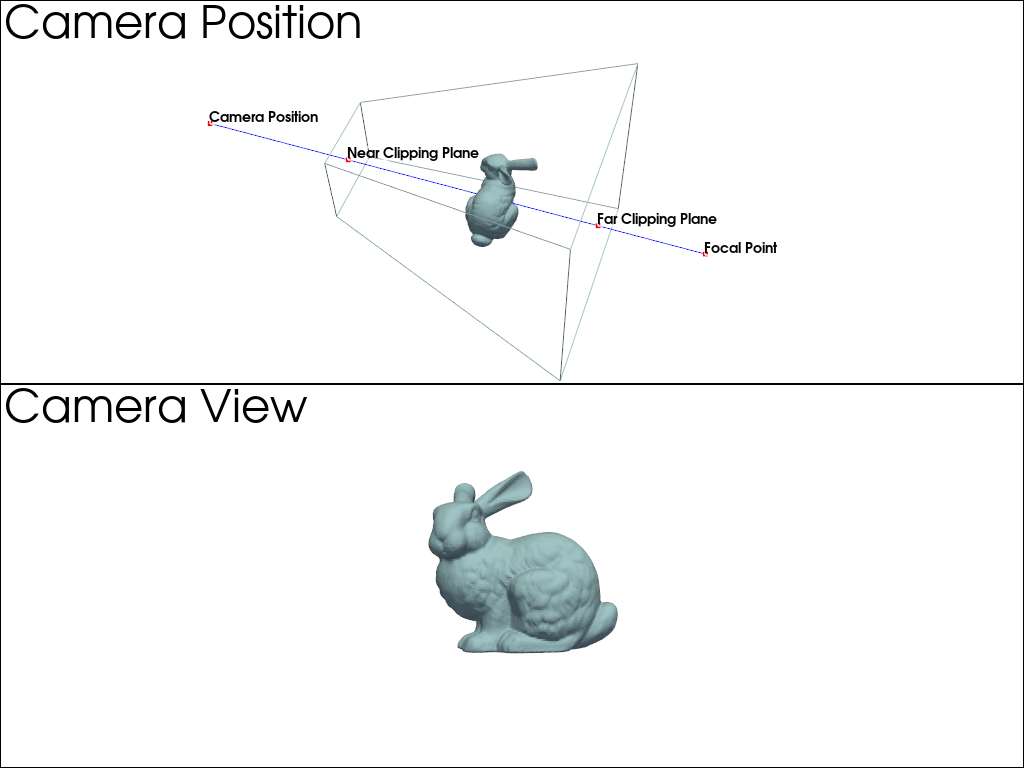
Create a frustum of camera, then create a scene of inside frustum.
import pyvista as pv
import numpy as np
import vtk
from pyvista import examples

pv.set_plot_theme("document")

camera = pv.Camera()
near_range = 0.3
far_range = 0.8
camera.clipping_range = (near_range, far_range)
unit_vector = np.array(camera.direction) / np.linalg.norm(
    np.array([camera.focal_point]) - np.array([camera.position])
)

frustum = camera.view_frustum(1.0)

position = camera.position
focal_point = camera.focal_point
line = pv.Line(position, focal_point)

bunny = examples.download_bunny()
xyz = camera.position + unit_vector * 0.6 - np.mean(bunny.points, axis=0)
bunny.translate(xyz, inplace=True)

pl = pv.Plotter(shape=(2, 1))
pl.subplot(0, 0)
pl.add_text("Camera Position")
pl.add_mesh(bunny)
pl.add_mesh(frustum, style="wireframe")
pl.add_mesh(bunny)
pl.add_mesh(line, color="b")
pl.add_point_labels(
    [
        position,
        camera.position + unit_vector * near_range,
        camera.position + unit_vector * far_range,
        focal_point,
    ],
    ["Camera Position", "Near Clipping Plane", "Far Clipping Plane", "Focal Point"],
    margin=0,
    fill_shape=False,
    font_size=14,
    shape_color="white",
    point_color="red",
    text_color="black",
)
pl.camera.position = (1.1, 1.5, 0.0)
pl.camera.focal_point = (0.2, 0.3, 0.3)
pl.camera.up = (0.0, 1.0, 0.0)
pl.camera.zoom(1.4)

pl.subplot(1, 0)
pl.add_text("Camera View")
pl.add_mesh(bunny)
pl.camera = camera
pl.show()
Controlling Camera Rotation#
In addition to directly controlling the camera position by setting it
via the pyvista.Camera.position property, you can also
directly control the pyvista.Camera.roll,
pyvista.Camera.elevation, and
pyvista.Camera.azimuth of the camera.
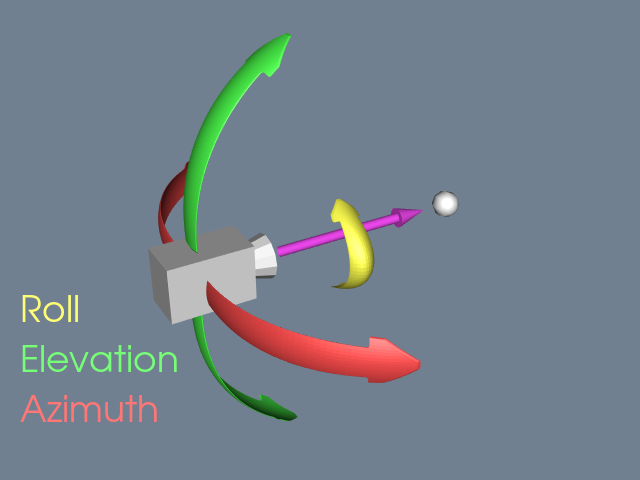
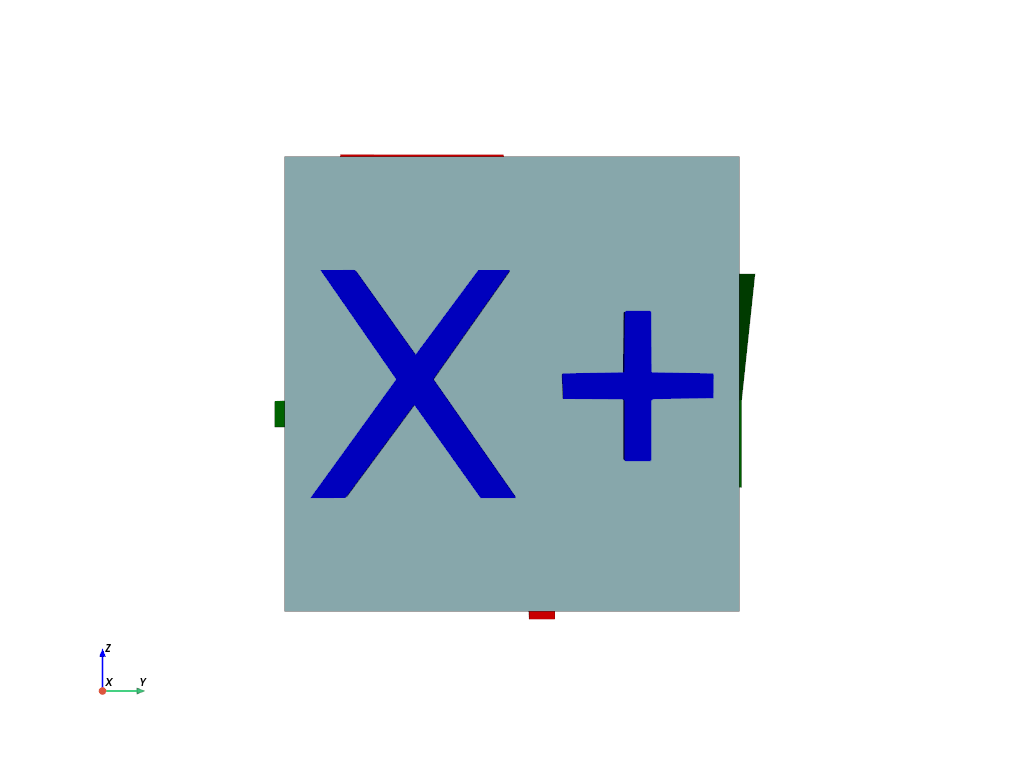
For example, you can modify the roll. First, generate a plot of an
orientation cube while initially setting the camera position to look
at the 'yz'.
from pyvista import demos
pl = demos.orientation_plotter()
pl.camera_position = 'yz'
pl.show()
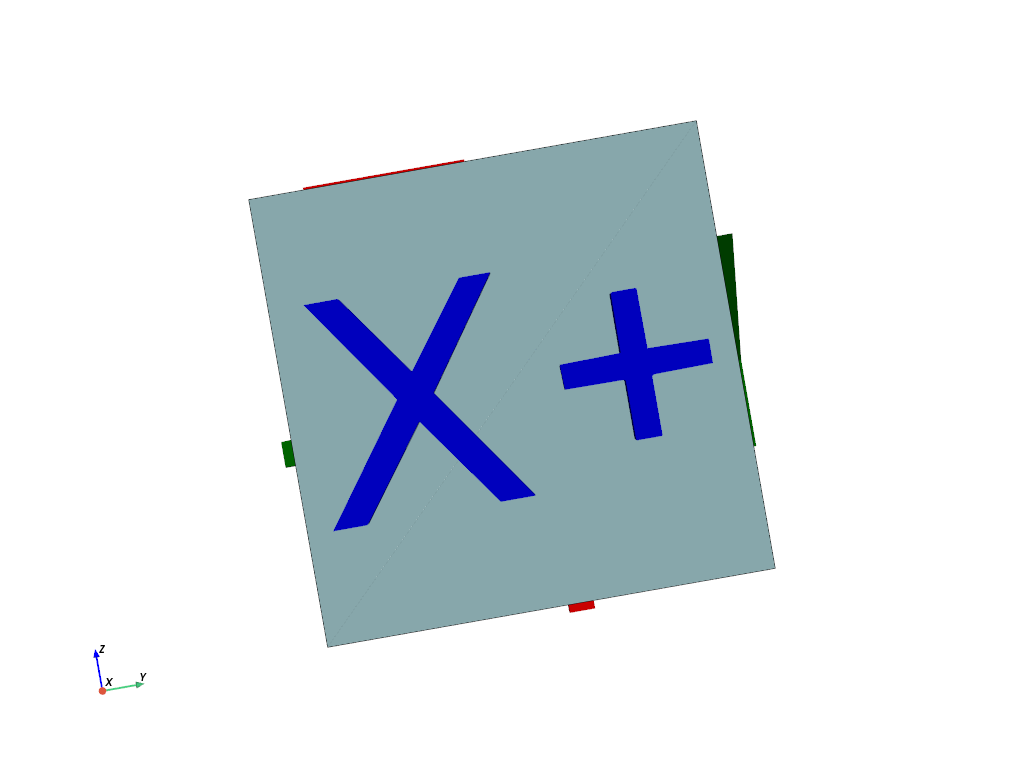
Here we modify the roll in-place.
from pyvista import demos
pl = demos.orientation_plotter()
pl.camera_position = 'yz'
pl.camera.roll += 10
pl.show()
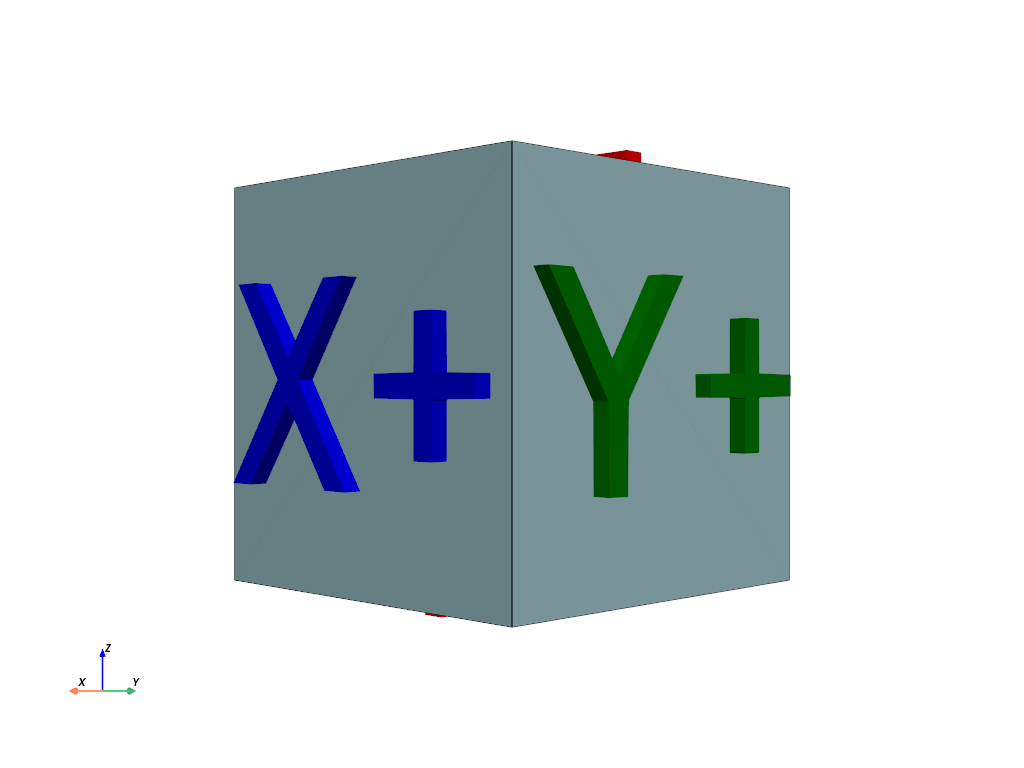
And here we offset the azimuth of the camera by 45 degrees to look at
the X+ and Y+ faces.
from pyvista import demos
pl = demos.orientation_plotter()
pl.camera_position = 'yz'
pl.camera.azimuth = 45
pl.show()
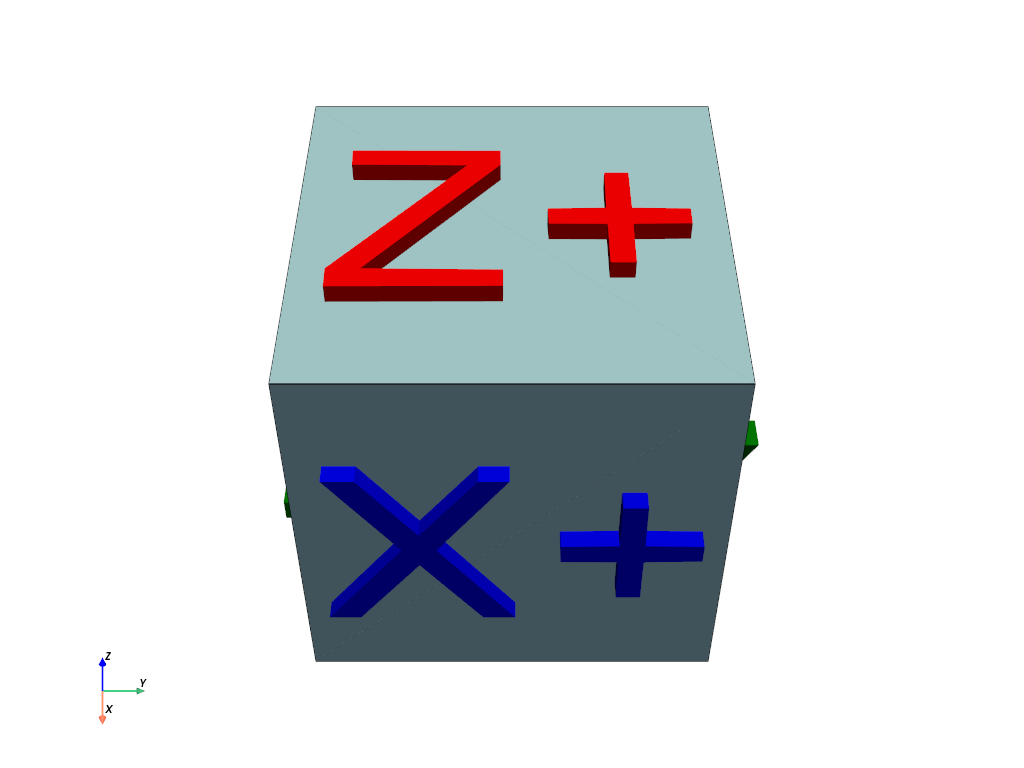
Here, we move upward by setting the elevation of the camera to 45
degrees to see the X+ and Z+ faces.
from pyvista import demos
pl = demos.orientation_plotter()
pl.camera_position = 'yz'
pl.camera.elevation = 45
pl.show()
Calibrated Cameras#
A camera calibrated for computer vision is described by a 3x3 intrinsic matrix
in pixels and a 4x4 extrinsic matrix that maps world coordinates to the camera.
Set and read both with intrinsic_matrix and
extrinsic_matrix.
import numpy as np
import pyvista as pv

extrinsics = np.eye(4)
extrinsics[:3, 3] = (0.2, -0.1, 6.0)

pl = pv.Plotter(window_size=(640, 480))
pl.camera.intrinsic_matrix = np.array(
    [[800.0, 0.0, 310.0], [0.0, 760.0, 250.0], [0.0, 0.0, 1.0]]
)
pl.camera.extrinsic_matrix = extrinsics
The intrinsic matrix is expressed in the pixel size of the viewport the camera renders into, so it is read back against the current window size and a camera that belongs to no plotter has none. Resetting the camera restores its default field of view, which discards the focal lengths.
The camera is a pinhole model with no lens distortion; apply distortion
coefficients to the scene with
enable_camera_distortion().
API Reference#
|
PyVista wrapper for the VTK Camera class. |